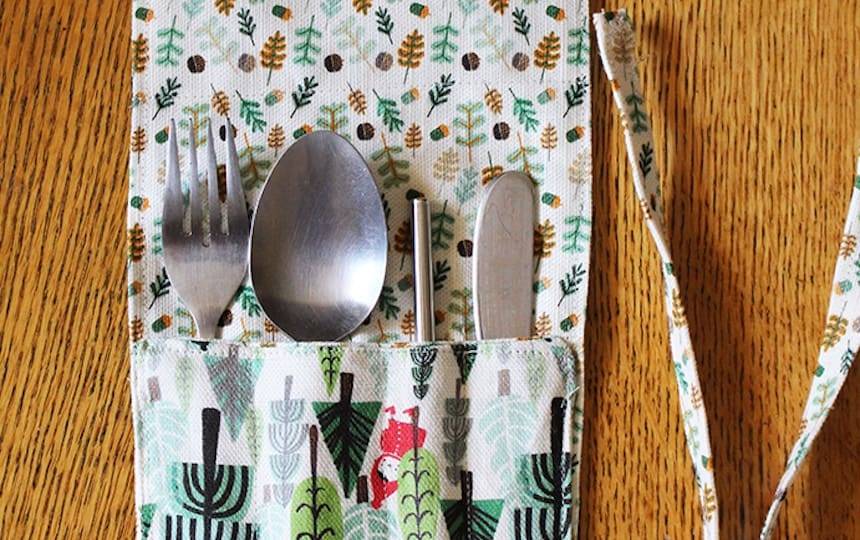
This zero waste DIY cutlery keeper tutorial is easy to follow and provides a super handy tool in your arsenal in the war on plastic.
Do you often find yourself out and about without a fork to eat your lunch, a spoon to stir your tea or a knife to share your morning snack?
Keep one of these DIY cutlery keepers in your bag, desk draw or backpack and you’ll never be stuck for a spoon again!
Follow along with our four simple steps and whip up this DIY Cutlery Keeper for yourself!
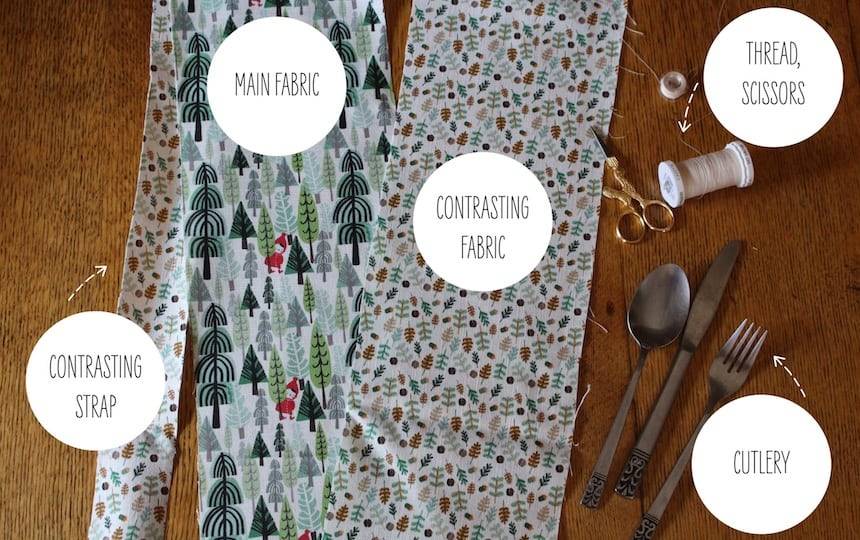
You will need:
- Scraps of fabric in main (outer) and contrasting (inner + strap) patterns
- Thread
- Sewing machine
- Pins
- Ruler
- Scissors
- Fork, spoon, knife and reusable straw

Pattern pieces:
- Cut 2 x rectangles 15cm x 45cm in main and contrasting patterns.
- Cut 1 x rectangle 5 x 65cm of the contrasting fabric.
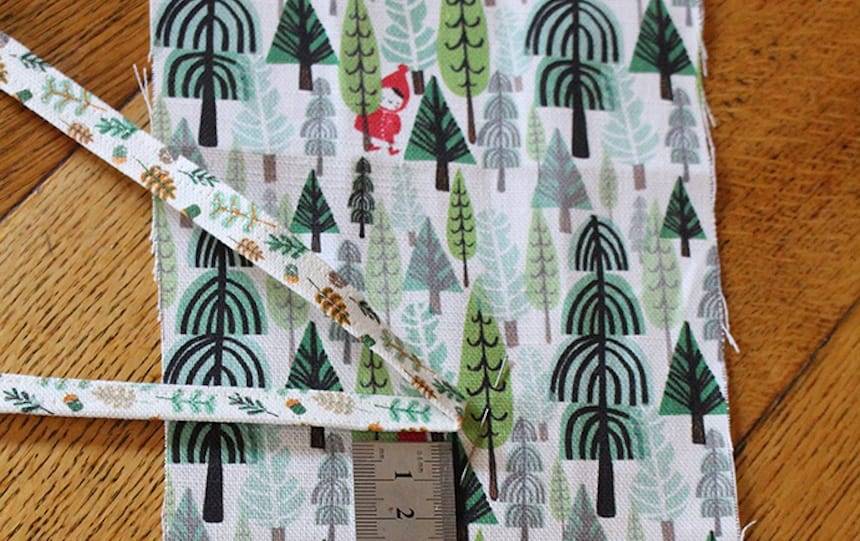
Step 1: Create the strap
Out of your longer rectangle, press edges 1cm over all around and then fold in half lengthways, tucking short ends under at each end. Stitch flat to create your outer strap.
Step 2: Attach strap
Find the centre of your strap, and pin it to your main fabric rectangle, in the centre, 15cm from the base. Stitch securely in place with a 1cm x 1cm square.
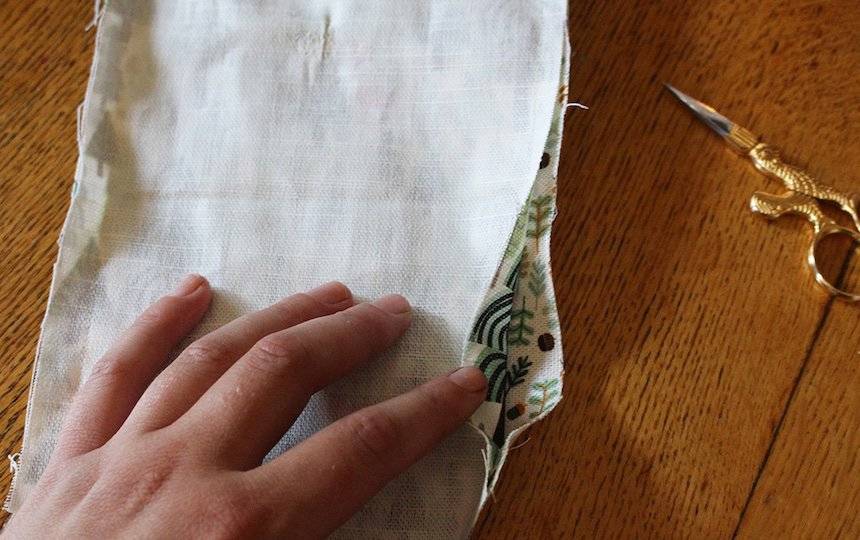
Step 3: Join main and contrasting fabrics
Pin two rectangles right sides together, ensuring you bunch the strap in the centre so it won’t get accidently sewn!
Sew a 1cm seam around the perimeter of rectangle, leaving a 10cm gap at the bottom left hand corner. Snip corners off, trim edges, turn inside out and press flat.
Step 4: Cutlery pouches
Road test your cutlery pouch spacing with the cutlery you intend to use in the pouch. First, fold up the bottom flap of the rectangle, until the fold is 2cm from the strap. Flip over and pin edges in place.
We found our fork needed 3cm, our spoon 3.5, reusable straw 2cm and knife 3cm. You want pouches to be taught but not so tight that you can’t squeeze items into them!
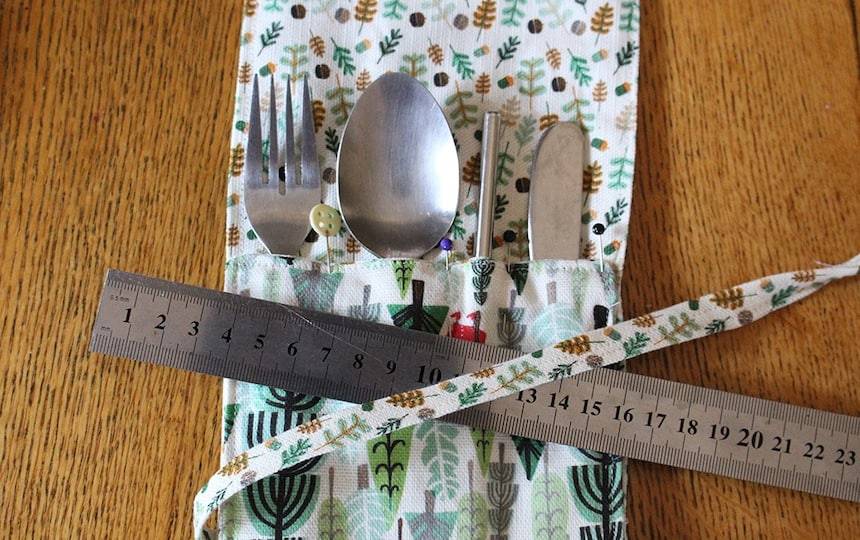
Use pins to mark each pouch and sew vertical lines between the base of the rectangle and the top of this flap. Sew a few reinforcing lines horizontally across the top flap of the pouch if you like, to keep it flat.
Now your ready to stuff your pouches and roll, criss-crossing the strap around the rolled pouch to keep it secure.